Examples Of Processing Direct Images
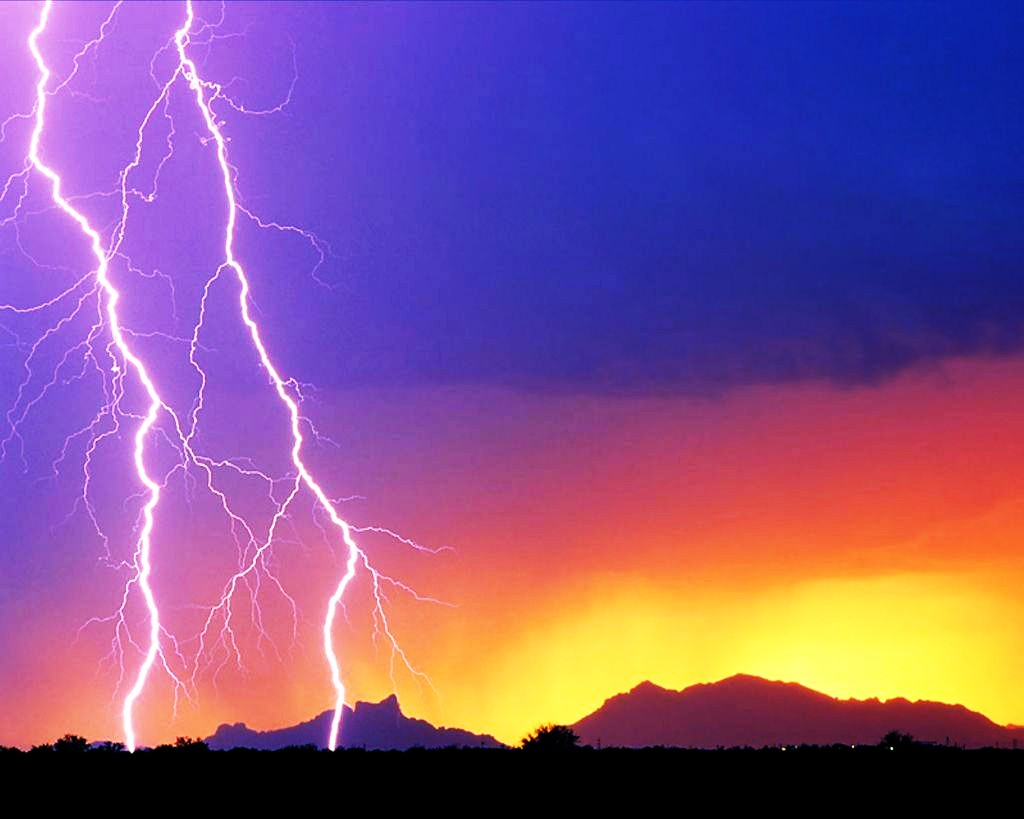
For demonstration purposes we will walk through several examples of how configuration changes effect the processing of individual images. To do so we need a subject for those images and an appropriate website to work with. For discussion purposes, let us assume you are looking for stunning images of lightning storms. You have done a Google search and found the site RexWallpapers.com and specifically a page with lightning striking in the desert which has captured your attention...
Internet Explorer does not directly display video files the way it does image files. Directly addressing a static video file (such as an MP4, FLV, SWF, or WMV file) will prompt you to open or save the file. Directly referencing a Raw Frame stream or a Page is very dependent upon how that frame is rendered by the hosting server. In some cases the frame will be renderded as basic HTML code or in some cases it may be a binary block of data streaming from a dedicated content server.
While this walkthrough deals specifically with directly referenced images, the concepts of how image files are stored and fusked by Image Surfer Pro present several concepts which are also relevant to the treatment of the other media types. The same Auto Ranging concepts would apply to any media file added by direct reference using the URL Capture Bar.
|
Description The image is interesting, but there is no clear way to see how big it really is. You can right click the image to download it or set it as your back ground and there are "Next" and "Prev" links above it. By using the |
||
| Before | After | |

|
|
|
|
Description In the ISP Form we see the page contained no video or frame content and the image we are interested in is the third image displayed in the blue image table. The image displayed within the ISP table is larger than it appeared on the original page, but may still be limited in size to assure both columns of the table are visible. We now have a direct link to the image and can display the image file directly by clicking on the image in the ISP Form. |
||
| Before | After | |
|
|
|
|
|
Description Once Internet Explorer is pointing directly to the image we can use the |
||
|
Configuration #1 First we will look at the {Auto Range} configurations on the Processing Tab of the user preferences. In this first example we have turned off Auto Range Fusking by unchecking the first configuration {Auto range when adding to the Collection}. |
||
|
Before
|
Configuration
|
After

|
Resulting File Segment
|
||
|
The result is that the single image file is referenced in the fusker collection. We can see the full path
of the image in the Image Surfer Pro tree to the left. The IE display window again shows the image now as
part of a visualization file. The file segment created has all of the file name and extention in the PreText. Looking at just the browser portion of the window it can be hard to tell the difference between the resulting page and the direct view of the image. The webpage generated by Image Surfer Pro simply displays only the image but you will notice if you hover over the image it is clickable and is linked directly to the image file itself. |
||
|
Configuration #2 If the {Auto range when adding to the Collection} configuration is turned on, then Auto Range Fusking will occur when we process a direct image file. The second configuration {Size of Range} will be used to determine how many possible files are referenced. Here we have set the value to 25. The next four configurations determine what starting point for the range will be used. Since we have not selected either {Always start with image number} nor {Search above and below added image}, the Auto Range Fusking will begin with the image we added (lightning_20.jpg) and look for "later" images in the sequence. |
||
|
Before
|
Configuration
|
After

|
Resulting File Segment
|
||
| The IE display window now shows two images along with several missing file blocks so evidently there was a single image after the one we were looking at. The resulting file segment in the fusker collection tree is shown with a [+] symbol indicating it is fusked and looking closer we find the PreText now contains "lightning_" and there is a numeric fusk. The numeric range uses two digits, starts at 20, and ends at 44. The start value came from the image we added (lightning_20.jpg), the end value was chosen as 44 since there are 25 images contained in the range 20 to 44, and the number of digits 2 was chosen because the initial file used two digits to hold the number 20. | ||
|
Configuration #3 In this configuration we will investigate the use of the {Always start with image number} configuration. When this configuration is used, the text field is enabled for you to set the value. In our case we will select 10 as the number to start from. Setting the starting point of the range essentially also sets the end point as well. The end point will always be the start point plus the range size minus 1 - such that the range includes exactly the number of images specified by the {Size of Range} configuration. |
||
|
Before
|
Configuration
|
After

|
Resulting File Segment
|
||
| This time our display page starts with a lot of images we haven't seen previously. The bottom of the page again ends with missing file blocks. Our tree segment is again numerically fusked with a start value of 10, and end value of 34, and uses two digits. The start value is clearly directly from the {Always start with image number} configuration and 34 is chosen as the end value to have the file cover exactly 25 images. The number of digits is chosen from the number of digits used in our initial file. | ||
|
Configuration #4 Rather than picking a starting point for the Auto Range Fusk we could simply ask Image Surfer Pro to center our initial image in the desired number of images. We do this by turning on {Search above and below added image}. We will leave {Auto add zero in possible range of references} turned off. |
||
|
Before
|
Configuration
|
After

|
Resulting File Segment
|
||
|
The IE display window now shows us the images we saw in the previous configuration along with
missing file blocks both before and after the images in
the sequence (images 10 through 21 seem to exist while the others don't). The resulting segment looks very
similar to that of our last example, but the numeric range is now 8 through 32. The starting value of 8 was
chosen because it roughly centers our initial image (#20) in a range of 25 values (i.e. 12 images before and
12 images after the initial image for a total of 25 images). We are still using 2 digits to hold the numbers
because our original image had 2 numeric digits. The first two images then are represented as "lightning_08.jpg"
and "lightning_09.jpg". It is possible files "lightning_8.jpg" and "lightning_9.jpg" do exist. This can be
determined by modifying the file segment's numeric fusk to use 1 digit and then using the
|
||
|
Configuration #5 After determining images "lightning_8.jpg" and "lightning_9.jp" do in fact exist we've decided to start with a direct reference to "lightning_8.jpg". This time we will turn on the {Auto add zero in possible range of references} configuration and investigate how that changes the result. |
||
Before
|
Configuration
|
After

|
Resulting File Segment
|
||
| Again the IE display window starts and ends with missing file blocks for the file "lightning_0.jpg" and those after "lightning_21.jpg". The images between 1 and 21 are all present and we can scroll down the page enjoying each. The resulting file segment looks very similar to those of past examples but the numeric fusk starts with 0 and ends with 24 and uses only 1 digit. When we started with image 8 there were not 12 prior images so the starting point was limited. Because we told it to consider the 0th image in the sequence with our configuration "lightning_0.jpg" was used instead of "lightning_1.jpg". Once the starting point was chosen the end point was placed 24 images after the start based on the {Size of Range} configuration. The number of digits used to hold the numbers was set to 1 because our starting file used only one digit to hold the value 8. | ||
|
Configuration #6 To demonstrate how the {Auto combine individual images into fusked images} configuration from the Images Tab affects the processing of single image files we will start in a state where only the first image (lightning_1.jpg) has been added to the fusker collection with the IE display area showing the second image in the sequence (ightning_2.jpg). With {Auto range when adding to the collection} enabled we will process the second image. |
||
Before
|
Configuration
|
After

|
Resulting File Segment
|
||
| The IE display area shows both images but if we scroll down we find images 1 through 21 are all present and images 22 through 26 are referenced but missing. The resulting segment shows an image segment with a numeric fusk from 1 to 26. Image Surfer Pro performed the auto fusking function and combined the new file references into an optimized file segment in the following steps: | ||
|
Step 1: The viewed webpage was determined to be an image file based on the file extension of ".jpg". Thus the file was treated as an individual image and converted to a single branched fusker tree. Step 2: Because {Auto range when adding to the collection} configuration was enabled the file segment of the newly formed tree branch was numerically fusked to reference images 2 through 25. Refer to the auto ranging process to understand how the numeric fusk was formed. Step 3: The newly formed branch is merged with the current fusker tree. In the process it is found that the new file segment is to be stored in the same branch as the previous file. The two file segments were then merged and optimized to form the final numerical fusk which references images 1 through 26. The merge and optimization process recognizes the leading text "lightning_" is common to all of the image references as is the file extension ".jpg". Once these strings are removed from each of the file references the remaining references are in fact a numeric sequence. The "Merging Fusker Trees" discussion topic is a great reference for understanding how fusker trees are merged. Refer to the optimization reference page to better understand how the merged segment was optimized. |
||
|
Configuration #7 To demonstrate how {Auto combine individual files into fusked files} does not always generate a numerical fusked file segment - but does always optimize the file segment we will process a single image file (lightning_12.jpg) while starting again with only (lightning_1.jpg) in the fusker collection. With the Auto Range Override set to a value of 5 we will use the |
||
Before
|
Configuration
|
After

|
Resulting File Segment
|
||
|
The IE display area shows both images but if we scroll down we find 6 images are referenced. The
first image which was already in the collection is referenced as are the 5 images 12 through 16.
The same three steps are used to generate the list fusked file segment as were used in the previous
example - however this time the remaining text was not a numerical sequence so a list fusk was
used. This example also clearly shows how the file URL being added to the fusker collection was first Auto Ranged before merging with the existing file segment. Notice the "1" which is present in all of the image file references was not split out into the pre or post text of the segment. Though it is common to all of the files it is not split out because if it were split out the first image file would be an empty entry in the list fusk. |
||